Using Git to rewind time and write tests after refactoring
One of my favorite parts about software engineering is that there is no end to the list of things that you can try. Some ideas are wild, and surprisingly they work. I recently worked on a piece of code that I had to refactor. The code smell I addressed was a bloated interface; several classes in the codebase implemented an interface. However, most of them implemented either one or two functions. The rest of the functions were no-ops.
Here's an oversimplified example of what it looked like,
interface MyInterface {
  fun a(param1: String, param2: Int)
  fun b(param1: String, param2: Int)
  fun c(param1: Double)
}Each implementer picked and chose functions that they needed. One of them only implemented function a, the other implemented b, and so on.
class NeedsA : MyInterface {
  override fun a(param1: String, param2: Int) {
    println("Using $param1, and $param2")
  }

  override fun b(param1: String, param2: Int) {
    // no-op
  }

  override fun c(param1: Double) {
    // no-op
  }
}One of the things that I do when I work on code that I don't understand yet is to scratch refactor it. Scratch refactoring is effective recon work that helps you understand the structure of the code and its functionality. It also helps discover dependencies that you may have to break to get the code under test.
I usually create a throwaway branch and mostly apply IDE/compiler-assisted behavior preserving transformations. I make a micro-commit for each change until I have enough information to begin the actual refactor.
However, this instance proved to be different. After finishing the scratch refactor, I was at my happy place where the public contract became straightforward, and I was pretty confident that the refactoring was a success. But I had no proof.
Usually, in this situation, there are two choices,
- Manually verify all behavior (too expensive and complicated to convince everyone in the team to adopt my practices).
- Throw away the scratch refactoring branch, write tests and start anew (standard playbook).
The third option
What if we could write the tests now? Wouldn't that be inaccurate and cement bugs that I may have introduced during refactoring? Not if we could go back in time. And that's what I did, metaphorically with Git.
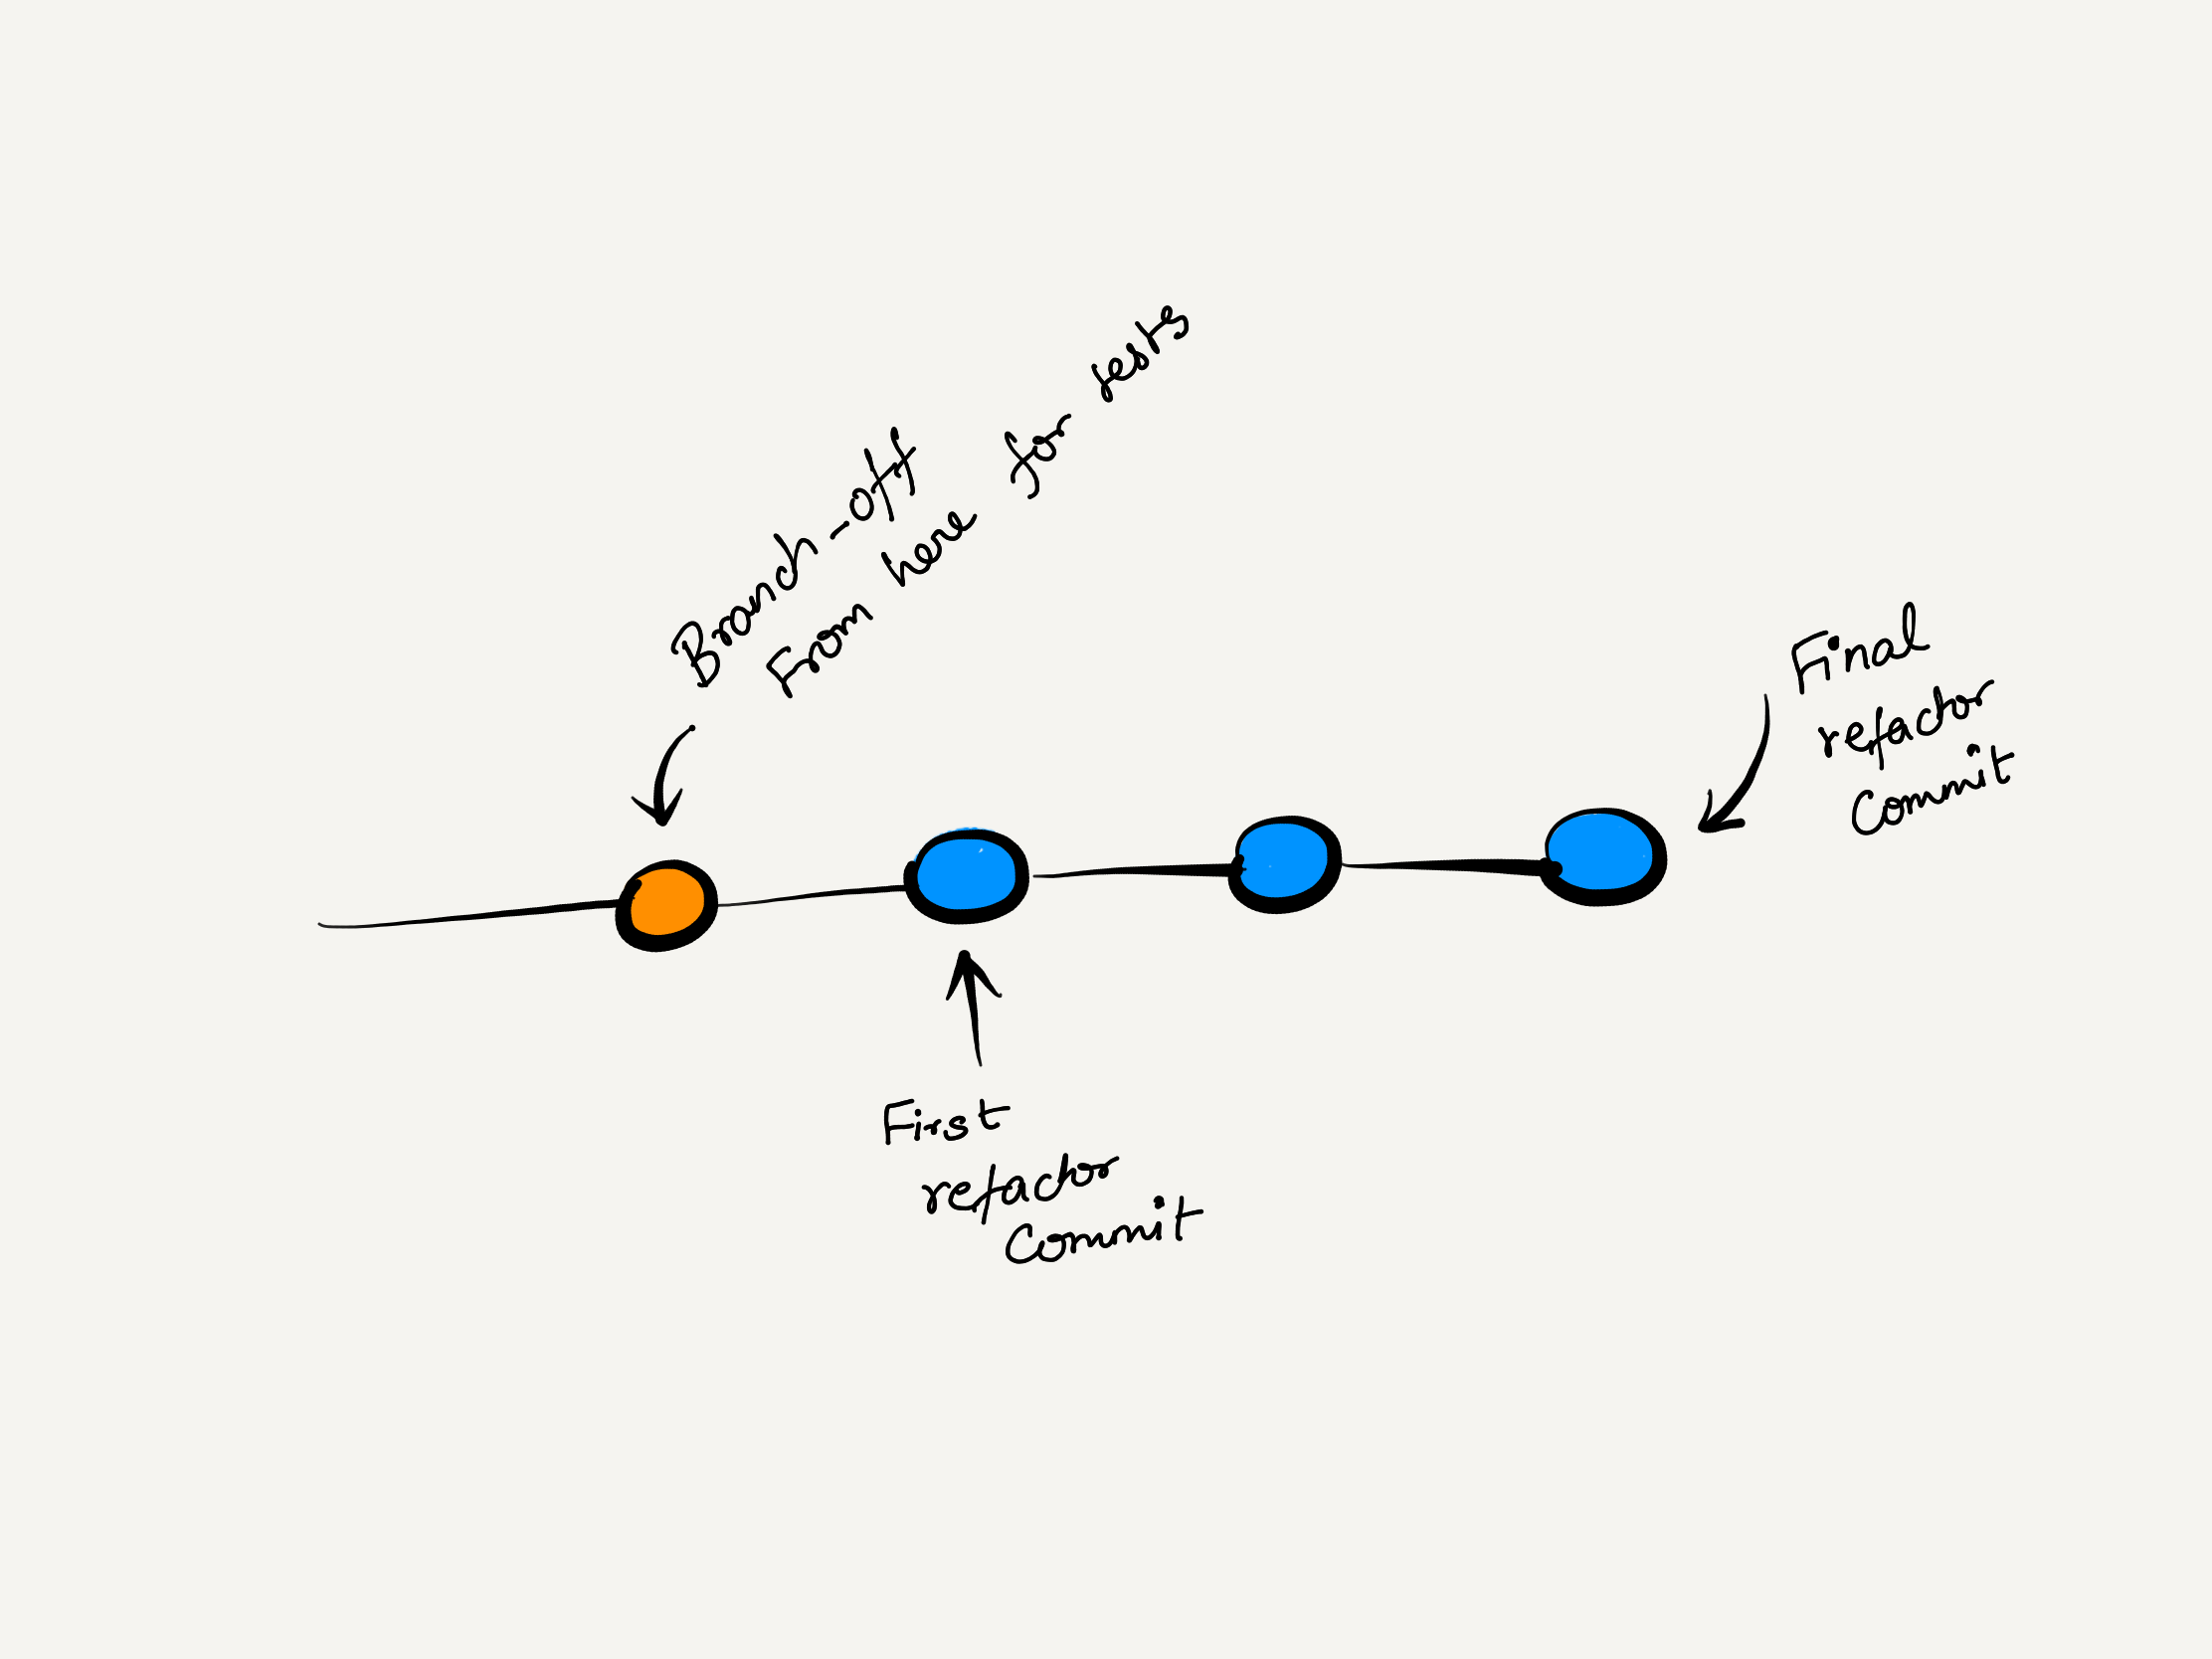
Let's say we have a branch named scratch-refactor that contains all the changes. We start with forking off another branch from the parent commit of your first refactoring commit.
Now, create a new branch named legacy-code-tests and bring the area of code you want to refactor under test.
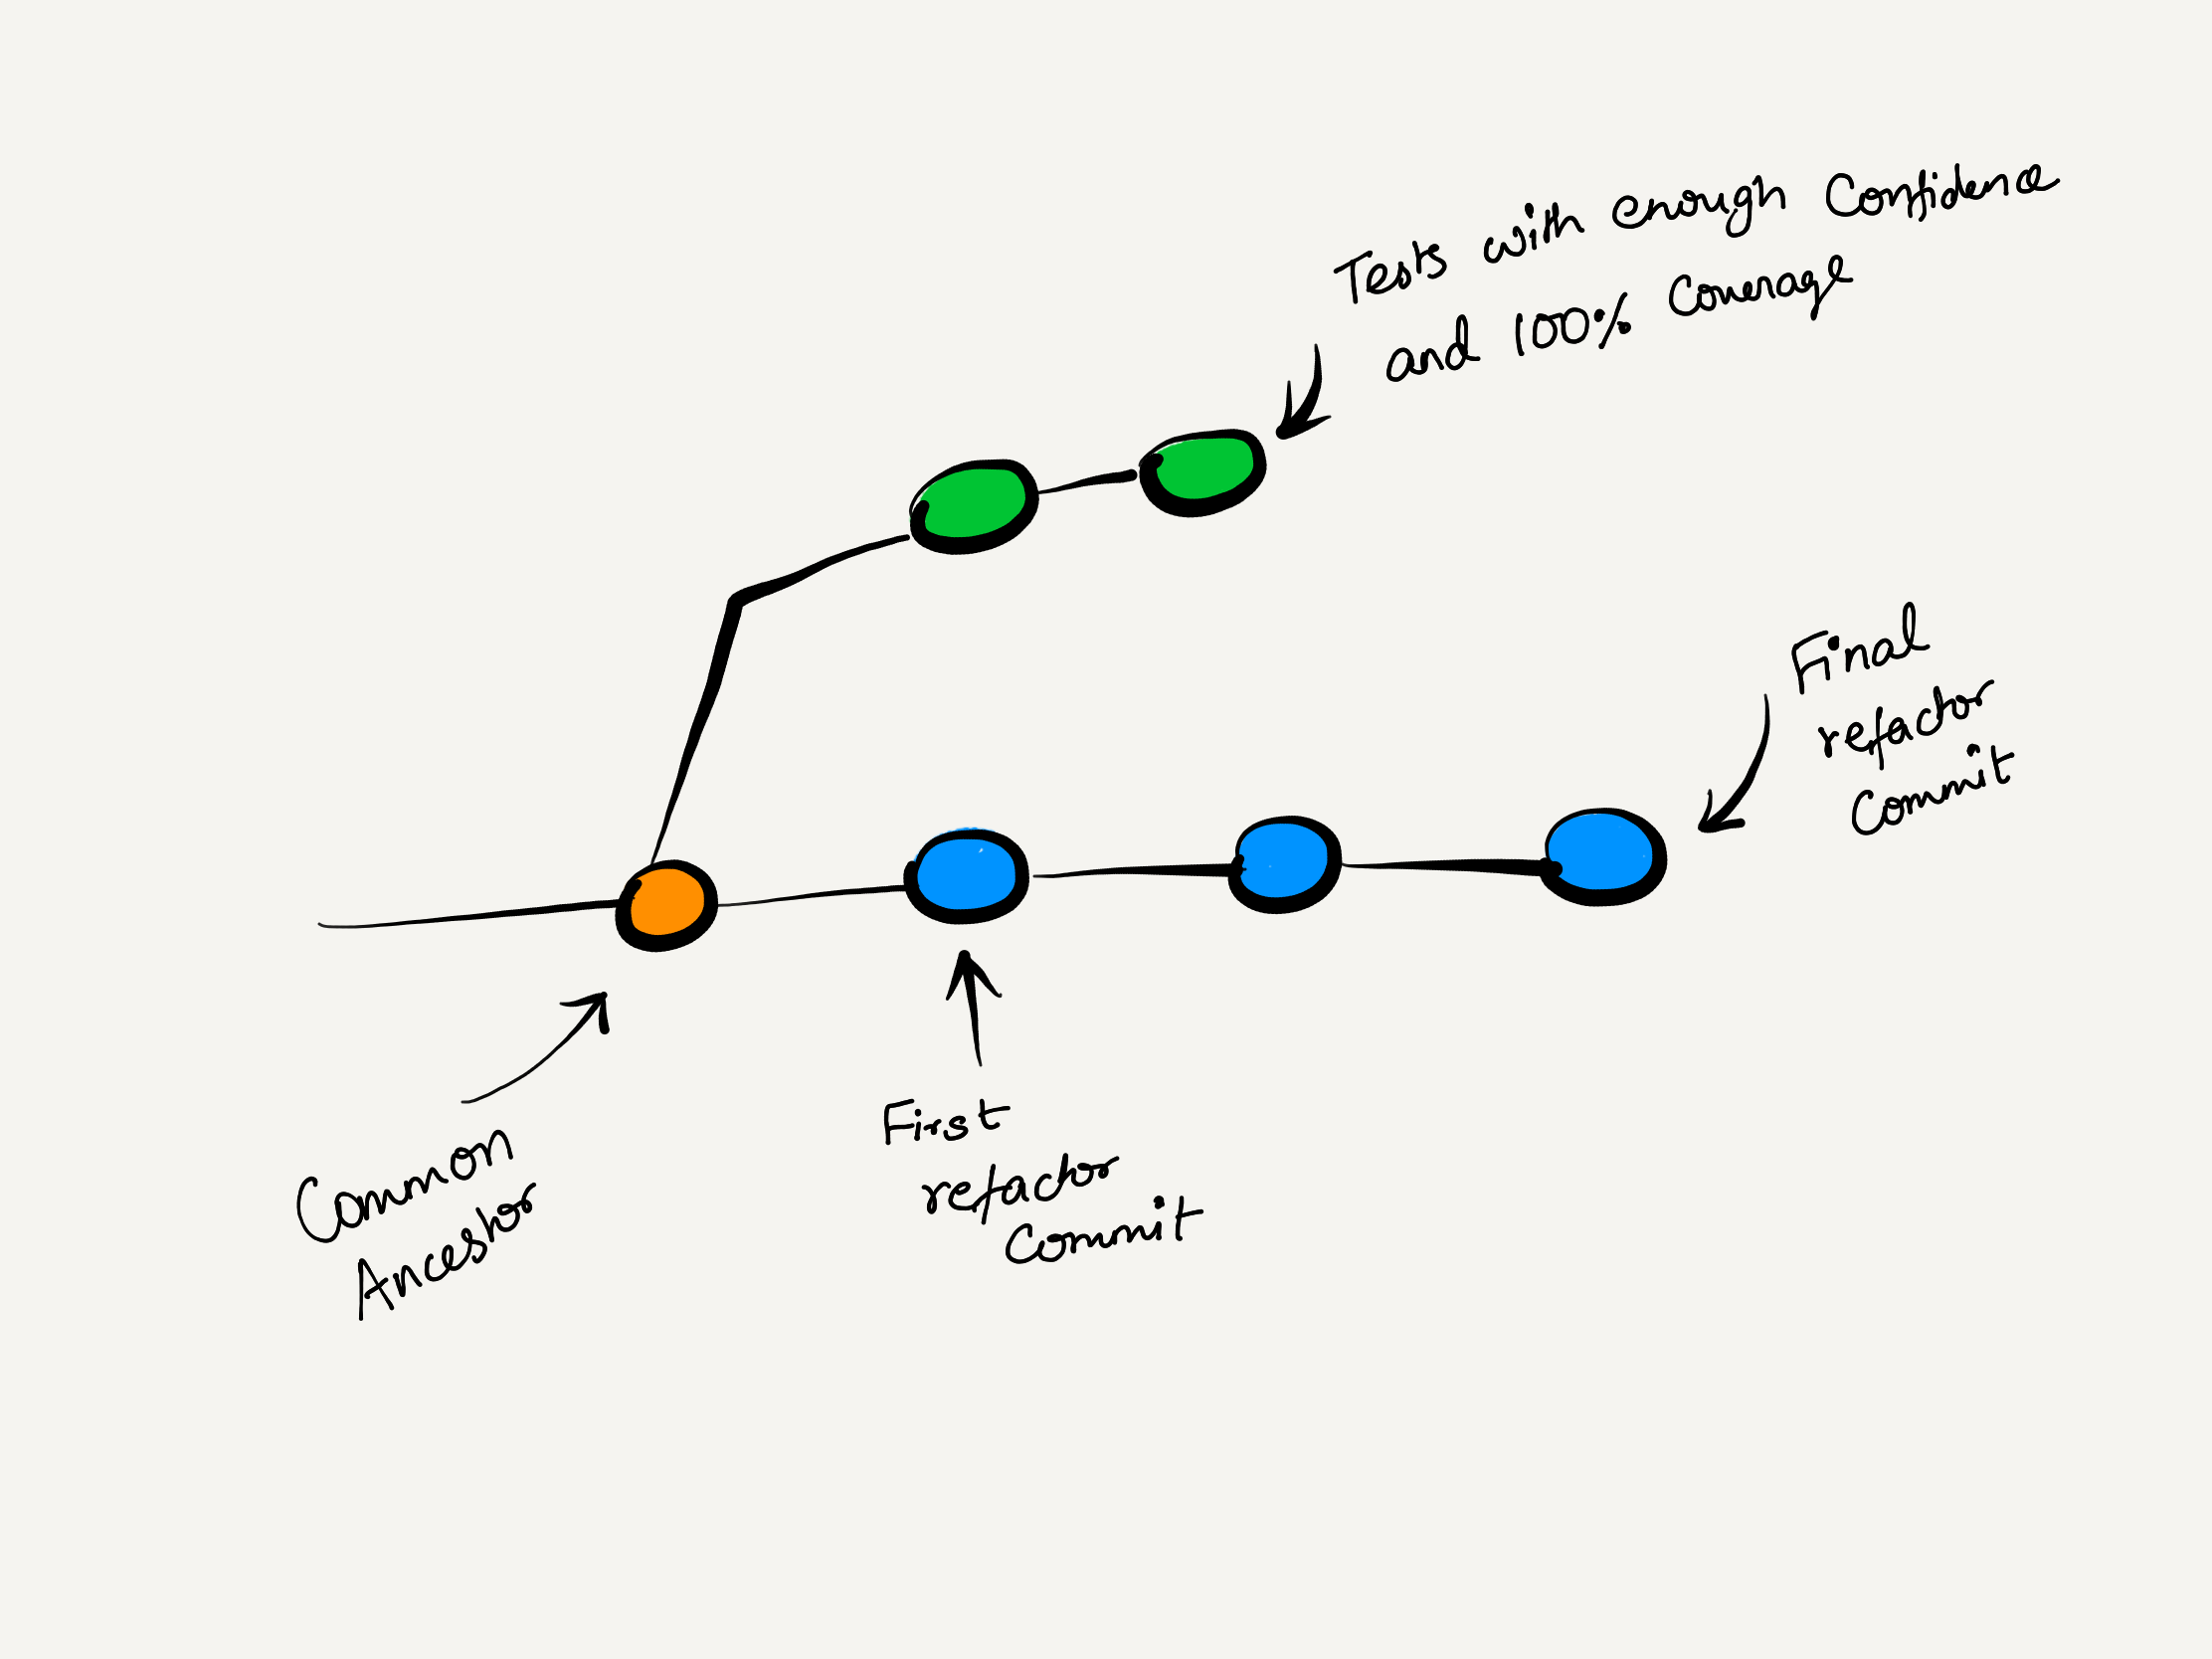
After writing the tests, we have two branches—scratch-refactor and legacy-code-tests. After looking at the diagrams, the answer might seem straightforward for those familiar with git rebase. But hold on because the devil is in the details.
Rebase with a twist
The two most common ways of bringing changes together from different branches are merging and rebasing. In this case, rebase is the right option because usually, we write tests for legacy code first and then make changes using those tests as regression protection. Rebase allows us to replicate that scenario even though we have written our tests after completing our refactoring.
So, we want to replay our commits from the refactored branch on top of our test branch. And as we do this, we also want to run all the tests for every commit during the replay. You can do this by running the following Git commands.
$ git checkout scratch-refactor

$ git rebase --exec "./gradlew test" legacy-code-tests
The first command checks out the branch containing the refactor commits. The second command replays every commit from the refactor branch on top of the test branch and runs the tests each time. In case of a failure, the rebase will stop and let you know why the rebase failed.
The reason for failure is the key to defining success in this technique. In my case, the test can ONLY fail due to compilation errors because of changes to the public interface. Your mileage may vary. However, any failures or modifications to the assertions in my tests mean the refactoring has FAILED. In such a situation, I have to throw away the refactored branch and redo the refactoring safely on top of the tests.
In my experiment, I had a FakeMyInterface class, and every time there was a failure, it was due to compilation errors on this interface. My tests did not change because instead of using mocks for verification, I used a StringBuffer to capture interactions with my collaborators and used a snapshot test to write these interactions on a file.
Therefore, the tests used a single assertion statement like this,
Approvals.verify(interactions)instead of,
verify(collaborator1).a("hello", 42)
verify(collaborator2).b("world", 11)
verifyNoMoreInteractions()Hence, changes to public APIs did not affect my tests. On a successful refactor, you should be able to see a rebased branch containing your tests and your refactoring commits. Any commit you may checkout from this branch should build successfully and pass all tests.

Why did it work?
- I used provably safe refactoring steps, either IDE-assisted or proven by the compiler.
- Every transformation was a micro-commit. Even though there were a lot of commits, each step was a small step in the right direction.
- I had a well-defined boundary for refactoring.
- I did not move too much code around. The objective was to clarify the contract and get rid of the fluff. As a side-effect, I did not have too many merge conflicts.
- There were no formatting changes between the branches, and I planned the style changes to be a part of a separate PR.
Risks
- Writing tests after the refactor is a risky technique, and I recommend using this technique as part of your intermediate to advanced strategy.
- The risk is directly proportional to the number of non-provable transformations you use in your refactoring. Use this to make a judgment call before going in this direction.
- My primary approach still is to write tests before I refactor or refactor just enough code to get it under test.
- If you move too much code around, you will encounter a lot of merge conflicts, and resolving the merge conflicts would take more time than redoing the refactor itself.
- This technique could work best when your tests sense only the behavior and not the implementation details.
- The technique would work best for example-based value tests, but writing tests for that such code is easier and less risky than this approach.
I may have left out some details to keep this blog short. If you have any questions, reach out to me on Twitter.